Showing posts with label Recommendations Tips and Tutorials. Show all posts

Tuesday, 18 March 2014

Judy's Vintage Digest

Back in January I was contacted by the team behind Judy's Vintage Digest asking me if I would like to be featured on their blogger map. You'll see me on page 33 as their representative for Durham, probably because even though I moved to the deep dark south, I do still make it back home whenever I can ;)

Their first issue was already out and I saw that it had a lot of really useful and well informed content about lots of different aspects of vintage so I was really pleased to have been asked to be involved :D

The digest itself is definately worth a look as there are lots of good little articles in there. I absolutely want to make one of those DIY storage boxes! Oh and even better it's free! Just click the link below.


Friday, 28 February 2014

This post is largely about hair, but also features a really cute Monsoon jumper

So this thing happened the other week (because I have a huge blog back log at the moment!) where a friend that I haven't seen in quite a while text me about meeting up. Turns out that even though we've been living well over 4 hours apart for the last 10 years we now live about 30 minutes down the road from each other!

What this did mean was that I needed to make myself look presentable at fairly short notice.

Now I'm no expert on vintage hair, but from the 'experts' I have spoken too I have gained a few bits of wisdom. One of the slightly strange tips I've been given is that dirty hair is good for doing vintage styles. Something about the texture allows you to tease and create a sleek look without as much faff as clean hair. A lot of hair stylists use product and curlers to give the hair texture but it seems there is nothing quite as easy as just leaving your hair to grease up.

Here is the style I went for:


This is the product of 3 and a half days of not washing my hair (yeah gross I know). I split it into 3 sections, two on the top and one underneath, teased the top two layers and rolled them into vertical victory rolls. Possibly the neatest I've ever done, and smoothed them using a smoothing comb from Boots.

(I also can't help but think that this make up somehow looks a bit 60s without the lipstick)
I split the back into 3 sections again and did one small roll under and two pin curls at either side.


This jumper is possibly my favourite at the moment, it was from Monsoon in the sale. I simply love the neutral colour and the lace pattern, but the best part is the faux button detail down the back.

The skirt was from a charity shop. It was pretty big on the waist so I used the sewing machine to take in some pleats at the back to make it fit a little better. I think this is one of the greatest gifts sewing has given me the ability to pick up things in charity shops that can be altered or adjusted cheaply to make an improved garment.

So one last thing too, the faux pearls, they were 50p from a charity shop. They're not a bad set and in pretty good condition with a good weight, they are fast becoming a wardrobe staple of mine.


Jumper: Monsoon
Skirt: Thrifted
Tights: Accessorize
Shoes: Clarks
Pearls: Thrifted

With this outfit I wore a pretty sweet coat vintage coat that I got of eBay for £4.99 (incl. postage) but I'll have to save that one for another day!


Wednesday, 4 December 2013

My first pair of glasses...

Now I must confess that in my time I have worn a fake pair of glasses. Not those wayfarer style hipster glasses but a pair of lovely vintage-style frames I found in a flea market... well I wore them once.But in a cruel twist of payback it turns out I have slightly weird eyesight, and I now have glasses. Real glasses. With a prescription and everything. Well, in one eye. Yeah I have freaky eyes and one is more short sighted that the other that is 20/20, I've managed to get by for quite a long time with a bit of a 'weird feeling' in one eye but the whole things was exacerbated when I started working at school and well, I need the glasses to look at the board and not get a headache. Yeah, seriously. I'm sure many long term glasses wearers are familiar with this story. I also need them for cycling and the suchlike.Anywho, I used a voucher for a free eye test from the back of an Argos receipt to go and get my eyes checked and once my prescription was handed to me, I have to decide what to do about buying glasses.Fortunately for me, I remember seeing a post on the Agoraphobic Fashionista about some glasses she got from Specspost  a super bargainistic website with tonnes of glasses in loads of different styles.I was super nervous about buying glasses since I've never done it before, but I thought somewhat naively that I know what shape sunglasses suit me, glasses must be the same right? Well I think I got lucky this time and picked up a pair of 'Geek Fashion Glasses' which I think suit me, although I will admit that the £23 price tag including lenses may have had something to do with it.Here I am wearing my new goggles:There are a few other pairs I'd like to try from Specspost, but I wasn't as confident they'd suit me so I went with a more generic shape, but I am definitely intrigues by the shuffle and the Mrs O.Do you where glasses? If so, where do you get them from?


Sunday, 1 December 2013

I got my hair chopped off!!!! At Rockalily Cuts.

A little while ago I won a competition held by Rockalily Cuts, the retro specialist salon run by ReeRee Rockette. I was completely thrilled to have won this competition since I have been dying to go to this salon for ages.

I did mean I had to have a very serious think about what I wanted doing with my hair. I wanted something I could set over night and then keep out the way for the day, something I wouldn't have to worry about tying up in the lab, and something a bit 50s inspired.

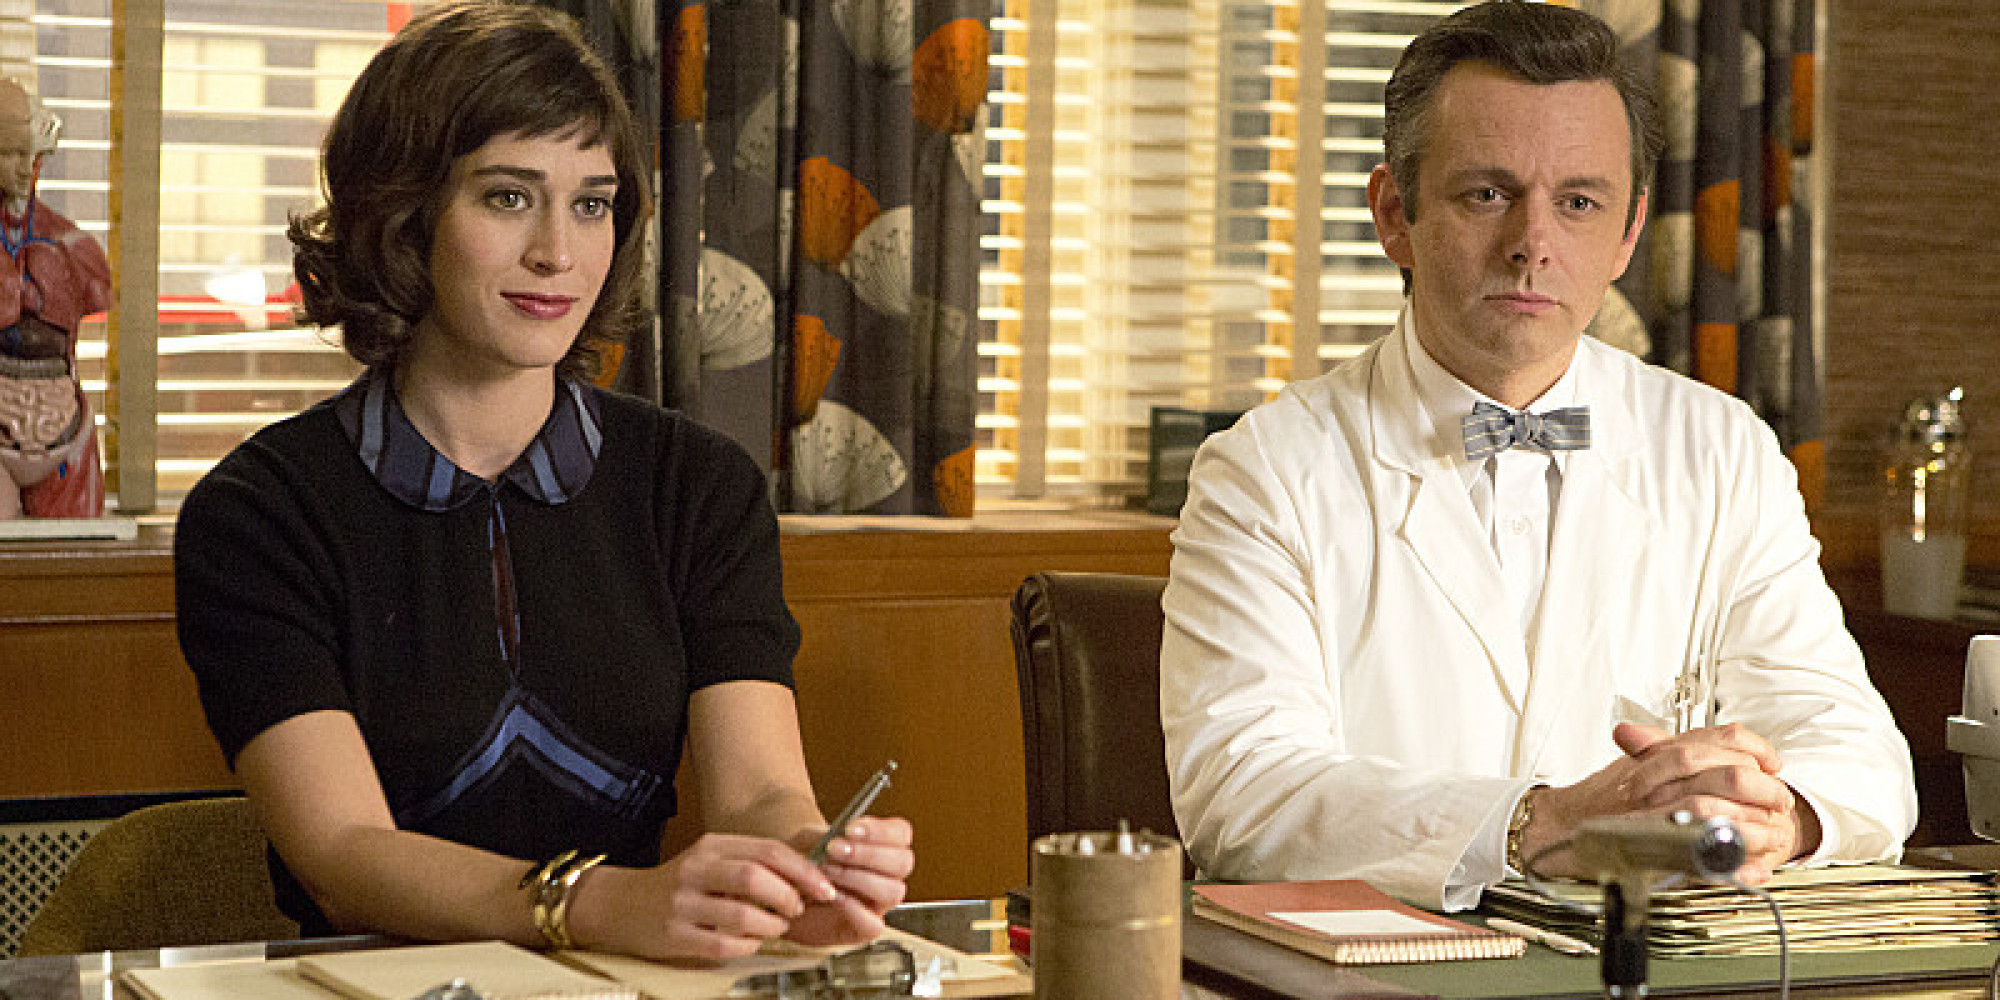
I found the perfect solution in Virginia's haircut in the Channel 4 show Masters of Sex. Just the right sort of length. Here are a couple of pictures just in case you haven't seen it.

Images are property of Showtime
So I decided to go for it, get the chop. But with head stylist Lucie doing my hair it couldn't possibly go wrong (unlike almost everything else I did that day!)

I hat a wonderful experience at the salon, I would highly recommend it to anyone as all the staff were very accommodating despite me being very late and they really know their stuff when it comes to retro cuts. One day I'll go back and get a fancy up-do too I think.

Getting styled:

The in the mirror shot of the finished cut (look how straight that fringe is!):

The back:

Here is my first attempt at styling it at home:


 I'm still getting used to is, but I am having fun trying different types of rollers to set it, and researching different patterns of pin curls. If you know any good resources for this type of thing I would love to know about them!


Tuesday, 29 October 2013

Cosplay Tips: Last Minute Couples Halloween Costumes

My husband and I had a great time cosplaying together at MCM London Comic Con last weekend so I thought I would put together a bit of an ideas post for you, featuring some of my favourite couples cosplays and costumes!

My husband and I dressed as Luigi and Princess Daisy from the Super Mario franchise:


Mostly the costumes are of an 'everyday cosplay' nature since it is only a few days to Halloween. On a side note, I also want to add that 'couples' in this instance means a couple of people, or a pair, I don't mean you have to be a couple, you could be friends, brothers, whatever. I don't really want you to limit costume ideas to your gender either - Rule 63 'For every given male character, there is a female version of that character. For every given female character, there is a male version of that character' can be a great idea to play with when doing fancy dress.

1 - DA
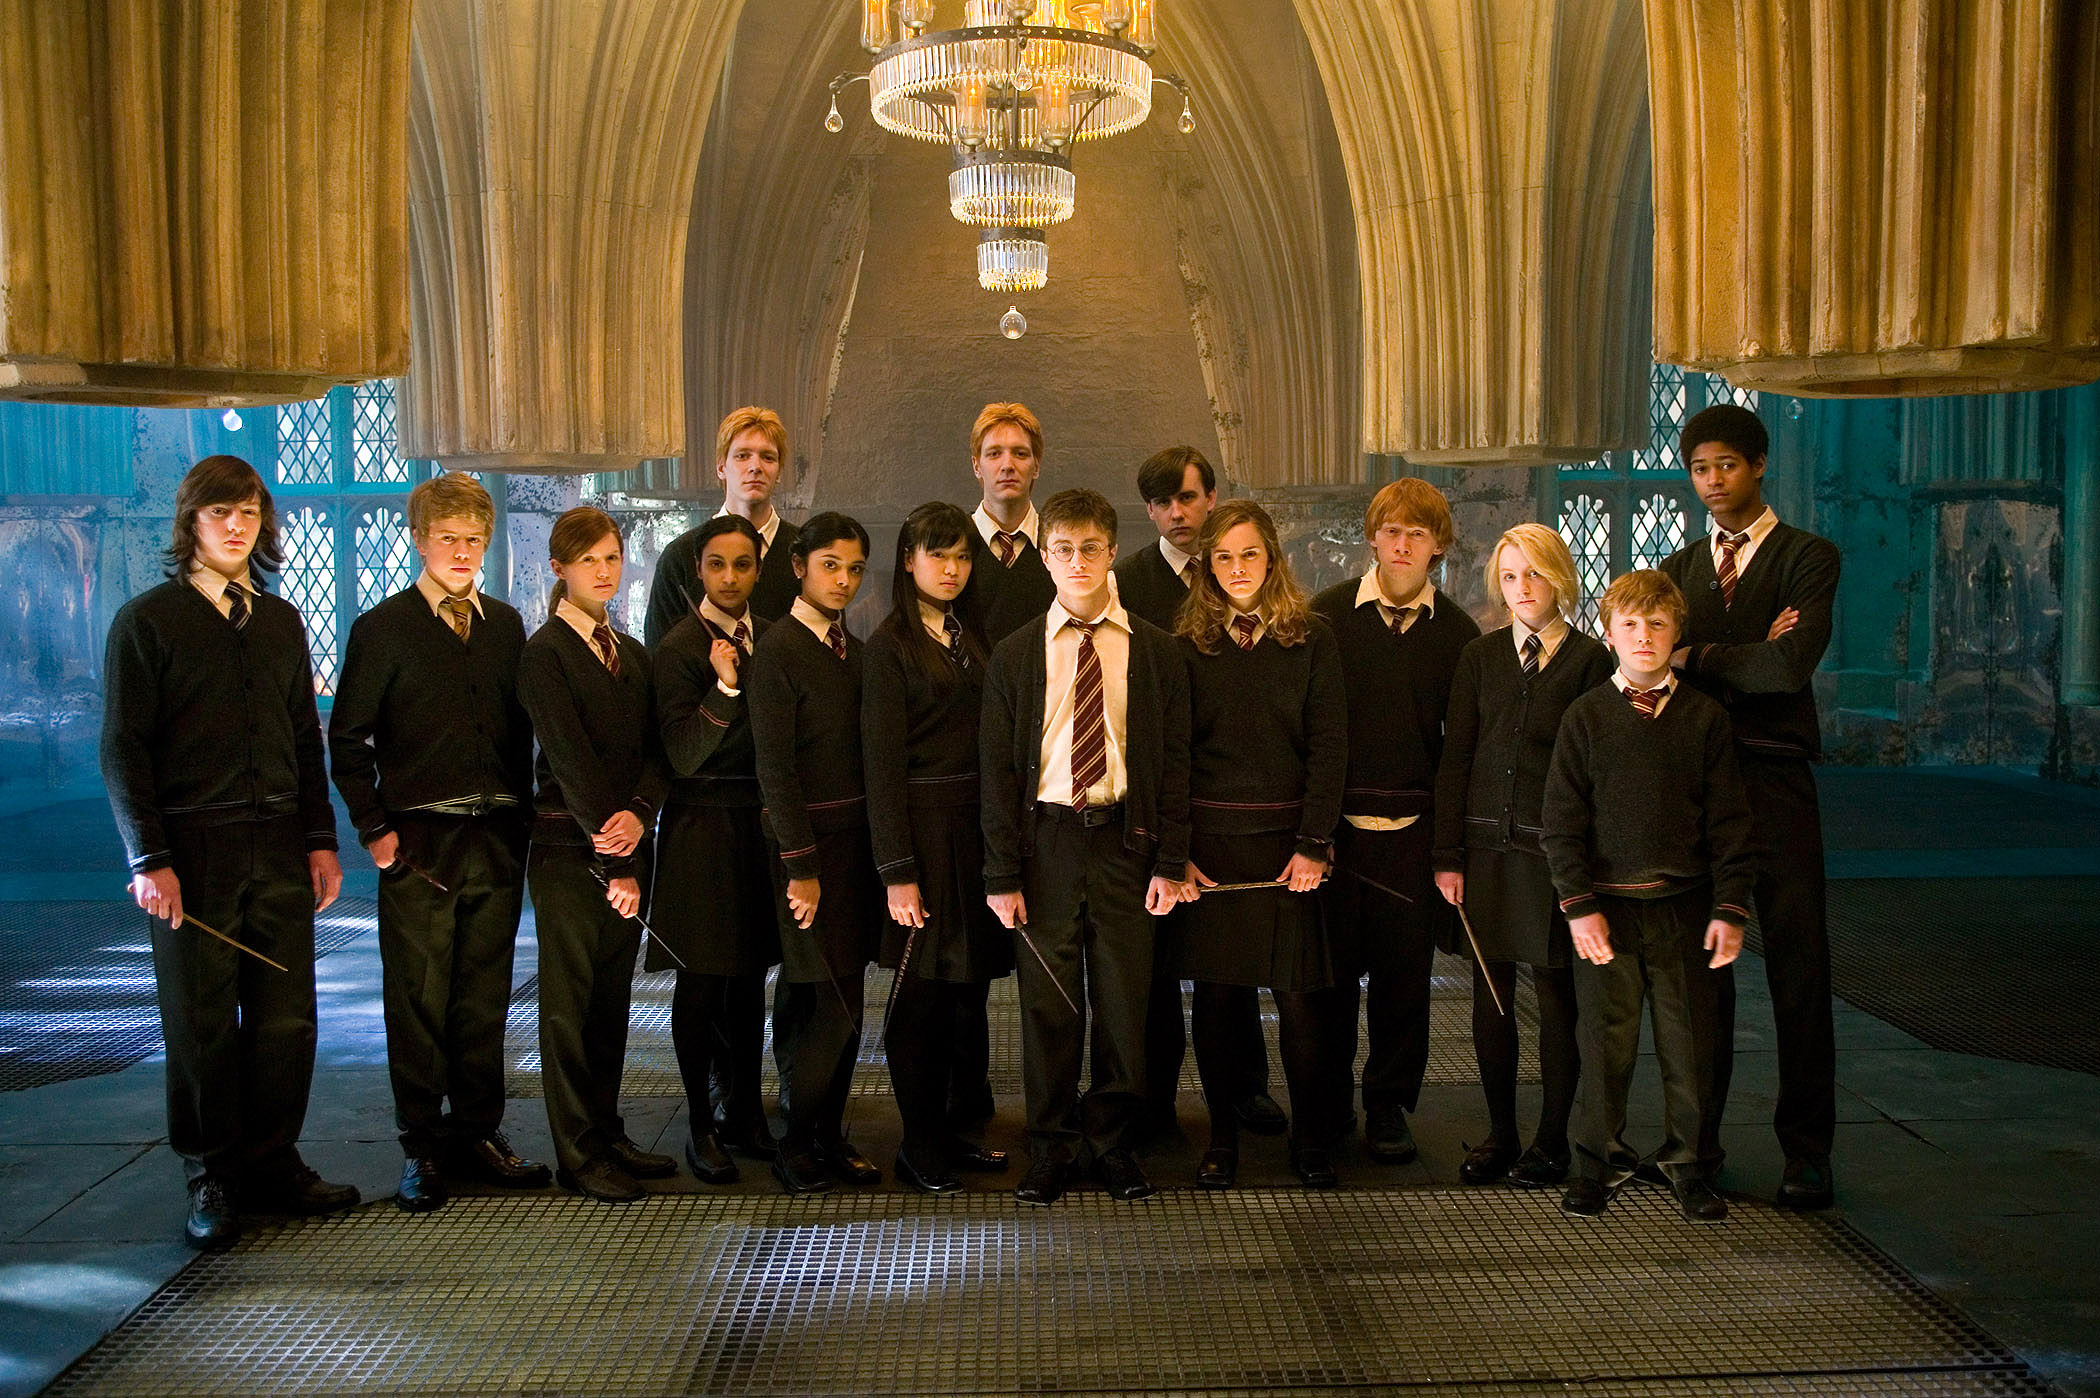
No, not the district attorney. Dumbledore's Army. Well, pretty much anyone from Happy Potter in general. Getting hold of s v-neck jumper and tie is pretty easy, generally you can borrow from a brother or father and getting something in the right house colours is pretty straightforward too. With an array of characters with various hair styles and colours too you can probably find someone to suit your needs. You could be Harry and Hermione, Hermione and Ron, Ron and Harry, Hermione and Luna or my personal favourite Luna and Neville. Just add a stick for a wand and your done.

2 - Bonnie and Clyde
A vintage inspired gangster number next, finding a lovely pencil skirt, or pinstripe suit is a good way to start this costume off. Add some plastic pistols and a fedora and you're done. Simple but effective!


3 - Angel and Devil
This one is another simple one that is pretty much gender neutral too. One person is an angel, one is a devil. One dresses all in white, one all in red. If you have time you can add angel wings or a set of horns wings - these are available in good fancy dress shops, but constructing some out of cardboard and string or and alice band should be fairly east too.

Optional extra: a large person that you can sit on the shoulders of...
(Kidding...)


4 - Superman and Lois Lane
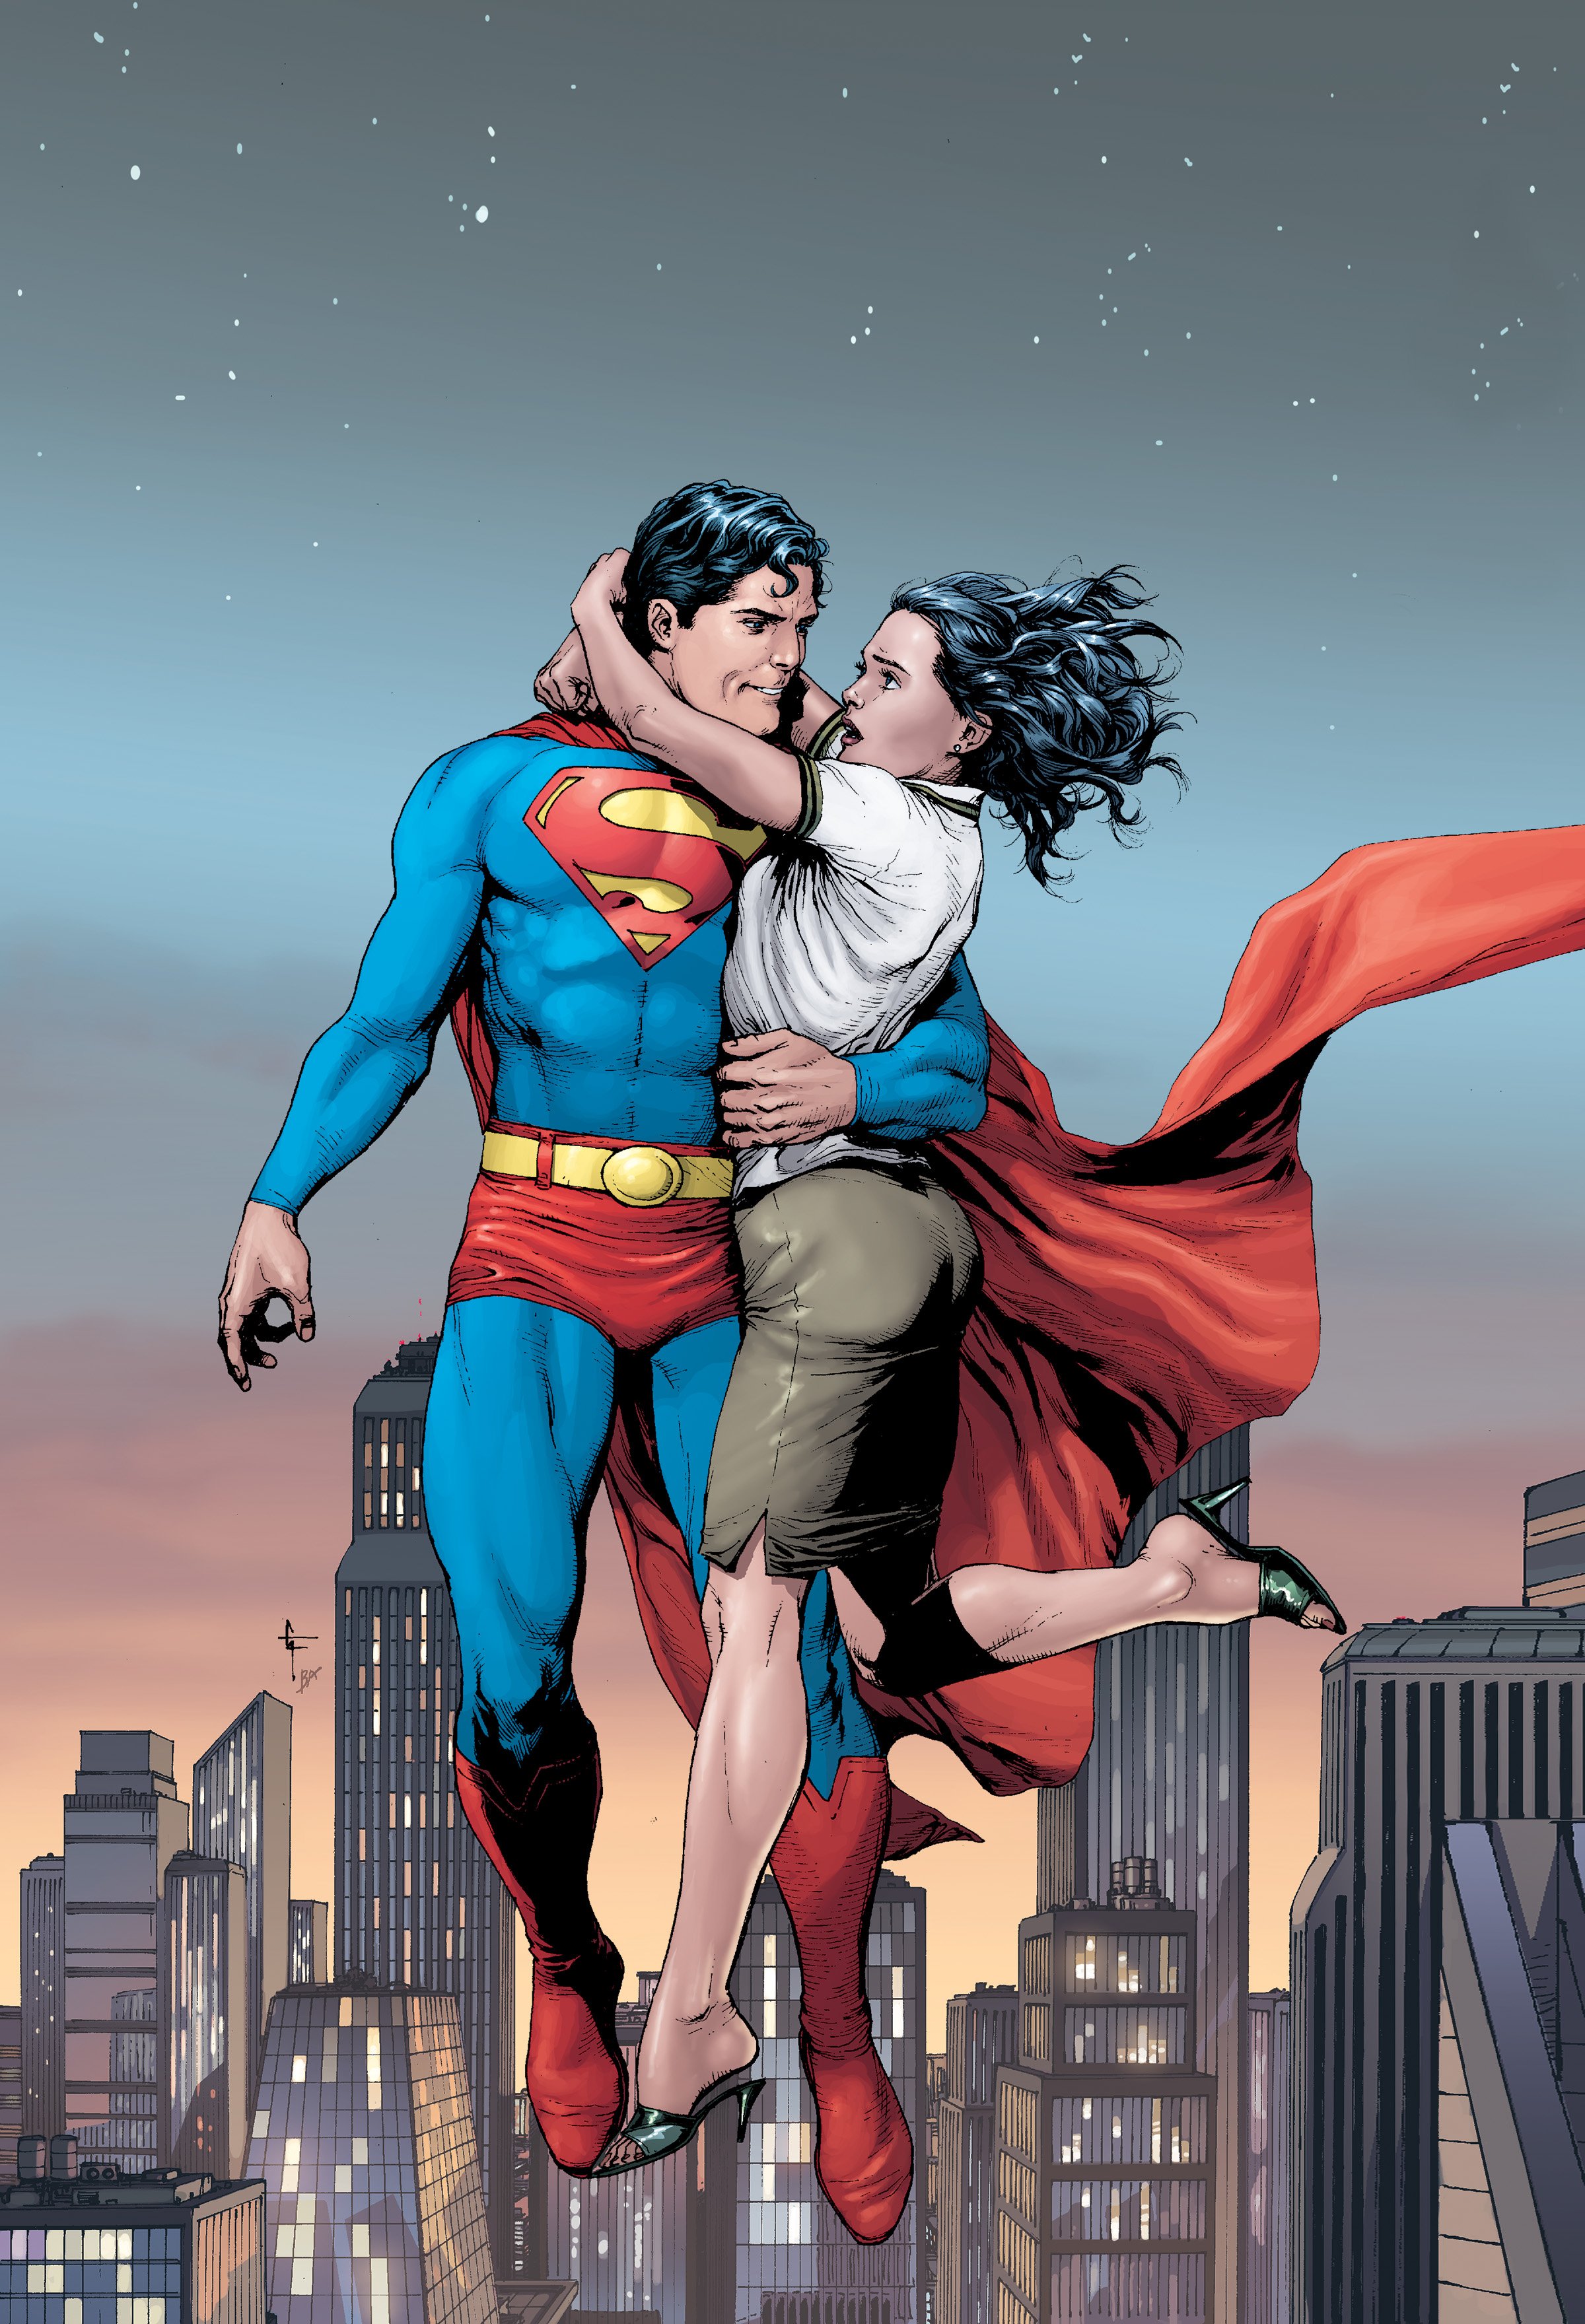
This one requires a little forethought, in that someone needs to visit a costume shop, but lets face it even Argos has a superman costume (although I'm not sure how good it is). But the rest of the costume is really easy, pencil skirt, blouse, note pad and you could print off a Daily Planet press pass if you're feeling creative. To quote Gordon Ramsay - done!


5 - Mulder and Scully
A wonderful 1990s classic here, Mulder and Scully from the X-files are a great option for a couple costume. All you need is a 90s power suit, toy gun and some faux FBI passes. Heck, you could even chuck in a little plushie 'little green man' if you're feeling a little bit eccentric.


6 - Harley Quinn and Poison Ivy
This last one requires a bit more effort, but is a bonus suggestion that makes the list because it is one I've actually done. I was going to a fancy dress event with Miss Doherty of The Vanity Case and the theme was superheroes. We decided to dress as comic book BFFs Harley and Ivy. The Harley costume is available to buy on some websites and costume shops, and a Poison Ivy costume could be whipped up quite quickly if you were to simplify the leotard using only a few leaves.


These are of course just a few ideas. Do you have any better ones? Let me know, I always like more suggestions!


Monday, 19 August 2013

Clogs from Sweden with Lotta's from Stockholm

I have been dithering over summer shoes for some time now, even though summer is nearly over... I really struggle to find comfortable sandals, ballet pumps that fit and shoes that don't shred my feet when I don't wear socks...

The idea of getting some vintage style Swedish clogs has been floating around and there are several brands available for varying prices but since I am waiting for my first pay check I felt a more budget friendly option was important. I came across Lotta's from Stockholm via their eBay shop which has pretty extensive stock but nowhere near as much as their online store.

I decided to buy a pair of red low heeled peep toe shoes to try out. They have featured in a few posts already (here and here) and to my surprise they turned out to be pretty comfortable once they were broken in, but they did take a few outings to soften the leather up and break them in. The low heel meant that the soul was also pretty comfortable and the orthopaedic sole means that my rubbish fallen arches were well supported. One little note on these shoes would be that they are quite big fitting, I usually take a size 40 and I ended up with a 39 in this style although you are well warned about this on their shop information.

I spoke briefly to the folks at Lotta's and they sent me a second pair to review free of charge! I decided to try out a different style so I chose the braided style in a higher heel and in that tan colour that goes with everything. I had to order a size bigger than the red style as they were a more average fit, however I will say that they took more breaking in than the red pair. The braids themselves were very tight when I first received them, but with some pulling and a bit of in house wearing they soon stretched to fit. They are less easy to walk in for long periods of time than the low heel but they're not too bad once you get used to wearing a heel. It probably isn't such a big deal if you're not a complete high-heel wuss like me!

All in all I'd say for this type of shoe Lotta's are pretty good value at half the price of some of the other brands. I can't speak too much on durability but I've been wearing them quite a bit for most of August and they seem to be still going strong!

Of course it wouldn't be a blog post without an outfit too! So here is the dress I wore my tan clogs with when I had the photos taken. It is from BHS but I have no idea when, it has shoulder pads which makes me think the 1980s, but the colours seem a bit off for that although I think the style looks quite 80s too. Anywho, I love this dress' pastel florals, it has an elasticated back but its so old the elastic has stretched indefinitely so I needed to re-sew pleats back into the back of the dress - I think I got away with it though :)


What shoes do you wear in the summer?


Saturday, 3 August 2013

Attempted Betty Bangs and Cutting my Own Fringe

Just a short post today.

I had a go at cutting my own fringe, now this is not the first time I have tried this and previously it has gone somewhat awry... This time, however, I had a secret weapon! I found a really good tutorial in the back catalogue of Retro Chick's site with a pretty comprehensive guide to cutting ones own fringe.

This is my second time cutting it using the methods outlined on the tutorial, the first time I did it in exactly the same way, but this time I tried blunt cutting the edges too so that they would go up at the sides a little more like Betty Bangs.

I didn't dare cut them short like full on Betty Bangs, as I thought I needed a little extra practice before making the leap.


The question is, was I successful? Or was it a bit of a folly? Do you think I should go for the shorter bangs?


Thursday, 25 July 2013

Review: Getting Wiggy With It - With Wonderland Wigs

A little while ago I received message asking me if I would like to review* a wig from the online company Wonderland Wigs. Clearly this was an opportunity I could not pass up as wigs play important role i every fancy dressers wardrobe.

I was able to pick any wig from their site, and there is pretty much everything you could possibly want in a wig, from realistic styles and extensions to bright blue and pink numbers. The question was, what to pick?

I used to have a bit of a ritual when it comes to my hair, where I'd let it grow for a while, then get bored and get it cut short. However lately I feel pretty settled with the length, unusual I know. My husband and I first met when I was in the shoulder scraping length of the growing out phase and he keeps saying I should get it cut shorter again. But I don't want to...

This is how my hair used to look

So the decision became super obvious, I would get a short retro style wig!

I chose the 'dita' which is inspired by one of Dita Von Teese's shorter styles, I was a little reserved about choosing a wig without a fringe as the line where the wig meets the forehead can be a little strange. But what better chance to try it out than this.

The wig arrived in excellent time and well wrapped, the package even came with a lolly pop in it. I have never owned a wig cap, and Wonderland were kind enough to send me a cap in the package too although I'm not sure it was really necessary, especially since it was little more than a cut off stocking. The first challenge was tucking all my hair under the cap, something I could not manage without a the help of a few bobby pins but once it was secure I was ready to try the wig.

Sexy and I know it...

The wig was a little tricky to get into place, as most are, but once it was on and fastened (it has two little bits that clip together at the back) it seemed fairly sturdy. I gave the wig a quick brush, and it did not shed much which I think is the sign of a good quality wig, and the style fell into place perfectly.


I think had I not had a fringe the front would have sat a little better on my forehead  but I think it was only a small niggle with the wig. There was plenty of hair woven through it and I felt that the back had really good coverage too which is rare in a short style.

Overall I think the wig was pretty good, and comparable with the prices of wigs I see on eBay and the cost it is worth it for a brush-able style with good coverage. But really I'm super excited that I get to have short hair every now and again and I won't need to get it cut! Always a bonus :)

If you wanted a wig like this it costs £24.99 and it is available from Wonderland Wigs along with so many others.

Let me know if you have ever got wiggy with it!

*In exchange for a wig that was sent to me free of charge


Sunday, 19 May 2013

Guest Post: How to Find Free Photographers to Improve Your Cosplay Pictures

Hi there everyone! Getting back into blogging slowly after a little gap (more on that later) with a rather good guest post on a topic that is certainly of use to me, and hopefully to you whether you cosplay or not.

How to improve the quality of your photographs by working with photographers. I am definitely hoping to use some of these tips at a later date! Anyone heading to MCM Expo next week, this is something for you to think about too - Enjoy!

*****

How to Find Free Photographers to Improve Your Cosplay Pictures

As a cosplayer there are few more satisfying moments than seeing a quality picture of yourself in a finished costume, especially if it's then shared and admired by other cosplayers. This could be via your own Facebook page, on a picture sharing website like Deviant Art, Flickr or Reddit, featured in a blog article or published in a magazine. Sadly many cosplayers are content with a low quality camera phone picture or a simple capture from a compact camera when we could get a lot better.
The general consensus is that having pictures taken of you by an experienced photographer or even someone with a good level of photography experience would be expensive, but this isn't always the case.
My aim here is to show you a number of options that you might consider for getting high quality pictures of yourself for a very small amount of money or even for free.

About Me
I own and run the Otleyrun Fancy Dress website and have a keen interest in photography.
As an amateur photographer I've taken pictures of a number of cosplayers, all of which I did for free. It was a great way to build up some experience and try out new ideas that I wouldn't usually do during a paid shoot. Free shoots allow both cosplayers and photographers to get a little more creative. Sometimes the results are fantastic, while on some occasions they aren't.
Here are a few examples of pictures I've taken during free photoshoots:


Before jumping into a shoot with a stranger it's important to consider your safety above all else. Please don't randomly contact a person and visit them in a private place. I'll cover this and a few other considerations at the end of this piece.
Here are a number of sources that, as a photographer, I would recommend you check out to find people to take quality pictures of you in cosplay.

Model Mayhem
If you've never visited ModelMayhem I highly recommend signing up for a free account and browse the talent on offer.
You can customise your searches to show only local photographers, which is really handy. Send out a few messages to any that offer TF (time for) work and see what you can negotiate.
It's also worth posting a casting call for photographers, which is free and announces that you're looking for local people to work with. That way interested individuals can come to you. Set the duration of the casting call to the maximum (I think it's a year) so that the listing will be active for a long time and new members have a chance to contact you. Newer members to the site are usually amateurs (most of the pro's were signed up years ago) so they're an important group to target.
Most photographers list who they've worked with previously on their profiles. Don't be shy, message the models and ask them about their experience with the photographer. This can weed out a few creeps and help you identify the decent people.

Finally please ensure that your profile is kept up to date, is spell checked for errors (pet peeve of mine) and clearly states what you're looking for. You'll likely get messages from people who don't take the time to read your profile but a well written and detailed profile will attract some quality applicants.

Cosplay Websites - Cosplay.com
If you don't have an account on here shame on you! It's a must have for cosplayers but there are many others like it. It's free to sign up and get going straight away.

This is a great site for networking with other cosplayers and might just lead you in the right direction of a few photographers as well. Ask around the local scene or post on your profile that you're looking to work with local talent. Both have worked for me in the past and they should work well going forward for you too.

Gumtree or Craigslist
These sites can yield very mixed results, but they're a free resource that we can all take advantage of. You can either answer model or cosplayer request posts or post one of your own.
I always ask applicants from free ad sites for a link to a profile on a more recognised site such as Cosplay.com or Model Mayhem as most genuine cosplayers will have a profile on one or both. This helps to prove that you're genuine.

Photo Sharing Websites: Deviant Art, Flicker and Reddit
I mentioned near the start of this piece that photo sharing websites are a great way to gain exposure and showcase your cosplay. They're also a great way to network with other cosplayers and photographers. You could send a polite message to a local photographer asking if they're open to free work or ask another cosplayer for a recommendation.

Conventions and Events - collect business cards or talk with photographers who approach you
If someone with a camera asks to take your picture at a convention you should always ask them where the pictures will be published (if at all). If they mention that they're a photographer with a blog or picture sharing account jot down the web address or ask for a card. Get chatting with them as it might just open doors to opportunities in the future.

Facebook Groups
Many cosplay groups exist, such as the UK Cosplay group, which bring both cosplayers and photographers together. Some groups set up photography events where all members are invited to attend and get shots done by multiple photographers. It's a great way to build up a diverse collection of shots from people with a range of experience. Some might also do some post production work on your pictures that will really make them stand out, for better or worse.

Important Considerations
If you're going to meet up with a photographer for the first time it's vitally important that you consider a few things before going ahead with it. Here are a tips to help identify the best people to contact:
  • ·       Check for feedback from other people. If you find that the feedback is more negative than positive find someone else.
  • ·       Make sure that the final picture edits will be made available to you for free and get a time frame for when this will be done.
  • ·       Ensure that the final edits won't be used for commercial gain by the photographer unless you're compensated.
  • ·       Only meet in a public place to shoot or take someone with you. If you're adamant about going alone make sure you tell a few people where you're going.
  • ·       Offer to meet the person for a tea or coffee at a local cafe before shooting with them so that you have time to gauge how genuine they are.


I wish you all the best of luck with your current and future cosplay projects and hope that this article has provided you with a few ideas. If you do end up getting some pictures taken by a local photographer please share a link to the final edits so that we can all see the results.

Thursday, 25 October 2012

Cosplay Tips: The Best Science Themed Costumes for Halloween


Halloween is approaching very quickly now with just one week to go before the big night - plenty of time to put something a little bit special together.

Some of you may know that outside the blog, vintage and costume world that I am a scientist - so I thought I'd make a list of some science themed Halloween of varying difficulty for you to get your teeth into. After all Halloween is the one night of the year when adults, as well as children, are able to dress outrageously, so why not embrace it?

I am planning on wearing one of these costumes to work for our Halloween Late event and I'm pretty excited!

Here is my pick of some of the best science themed Halloween costumes:

Dr. Frankenstein, Frankenstein’s Monster or Bride of Frankenstein
From Frankenstein 1931 here and Bride of Frankenstein 1935 here


Good ol' Frank is the original mad scientist! You could play the part of scientist with nuts and bolts and a sawn off (false) leg. Another option is that you could dress are Dr Frankenstein’s monster made up of the composite parts of previously deceased individuals - a flat top head mask and neck bolts from a fancy dress shop are an option but for a simpler, and quicker, version you could paint sewing seams and ghoulish make-up to your flesh. For ladies wanting an alternative spin on this classic you could take the Bride of Frankenstein route by digging out a gaudy old wedding dress, pale make-up and big hair with spray streaks in either side.

Darwin, Einstein or Curie
DarwinCurie & Einstein


The beauty of these costumes is that they are mostly able to be made using bits and pieces from your wardrobe or charity shop, an old dress, a vintage suit, with the addition of a few fancy dress items. The above are just a few of the many options you have if you want to attempt the famous scientist route. For example for Darwin you need a long grey beard (and perhaps, for Einstein a voluminous white wig and for Marie Curie a black dress, Edwardian up-do and if you're feeling in a bit of bad taste some glow sticks?

Schrodinger’s Cat
Image source


Everyone knows of the traditional Halloween black cat costume and Schrodingers cat is a science twist on this traditional costume. Schrodinger’s cat was a thought experiment that ponders whether a cat in a box is alive or dead (more info can be found here). To give the, widely available, cat costume the quantum mechanics spin you could add cardboard speech bubbles saying 'am I alive?' and 'am I dead?' you could even pick up a box to wear from your local supermarket. If you're feeling very adventurous you could even make up one side of your costume to look like a zombie cat.

Sci-fi Inspiration
Weird Science, 'Doc' Emmet Brown, Mr Spock 


Taking inspiration from science fiction films is another option, a ‘mad’ scientist like Doc Brown from Back to the Future or Lisa, synthesised girl from the movie Weird Science! At a push I'd also add Mr Spock from Star Trek - he was the science officer after all.

Cardboard Robots

I know this one's not cardboard, but you get the idea right?

If you've looked at some of my other costume posts you'll know this is one of my personal favourites - the cardboard creation! Suiting up in boxes to appear as a robot is pretty nifty and all it takes is a lick of paint and some creative scissor work. If you're stuck for inspiration check out the amazing box work of transformers fans - some of their designs even transform! Another extrapolation of this idea is the painted A-board style costume - two bits of card, some poster paint and some shoulder straps and you can be almost anything you want! A cell? No problem, a Bunsen burner?  Sure, the Higgs boson? Perhaps a little trickier but with some creative cutting, why not.

I hope that's given you a few ideas if you're planning to take a turn for the geeky for whatever you are doing for Halloween.

Tuesday, 10 April 2012

A Quick Guide to Buying Costumes


A lot of real (and I use this term loosely as to not offend anyone) costumers and cosplayers will tell you that if you’re not making your costume, then you’re doing it wrong. I, however, think it is important to keep and open mind about these things. We all lead busy lives these days and while it may be easier for some people to find the time to practice ninja-like sewing skills, some of us simply may not have the time.

For example my life is a little chaotic right now! In the last month I have been finishing up my labwork for my PhD (which requires very long shifts in the lab) I have moved house twice, and am due for a third and final move next weekend, I had my birthday last weekend, I have prep work for my wedding, keeping on top of comics for Den of Geek… oh and my leaving party – which of course, is fancy dress!

I’m sure you can forgive me if I didn’t have time to work on making anything too fancy for this event, so I turned to the costumers back up plan – the bought costume.

I have had a fair amount of success with bought costumes to date:
My Sally costume from a Halloween past was a great licensed costume, it even included the wig, but some extra tights to make my arms and legs blue and some extra facepaint really made it stand out. For my birthday last year I dressed a Jessica Rabbit using a bought dress and a wig, and of course my Harley Quinn costume was bought from eBay many moons ago.


I wont tell you what my new outfit is yet, only that the party is USA icon themed and my outfit will be very appropriate for this! The costume was very kindly provided for me to wear by the folks at:


Who sell a wide range of licensed costumes - and with some very minor adjustments using a needle and thread I think this will be a really fun costume to wear, and with this in mind I thought I’d give a few of my top tips on maximising success when buying costumes.

Choose carefully and work with what you have
Its worth taking a bit of time to consider the theme, and chose an outfit that works with your colouring and body type. Choosing someone or something with the right colour hair is just one less thing to worry about after all. It also helps to think about skin tone, make-up style, shoes etc. anything that you already have will make the costume that bit more authentic and reduce the number of things you need to find or buy.

Think about longevity or re-sale value
This is a sort of bonus really, but still worth thinking about, if you are taking the time to buy items for a costume you really should pay attention whether an item will be usefull for another costume. The more you can wear it the better! For example my black catsuit has been worn four times as three separate costumes, Selene, Black Cat and Catwoman with more potential for a fourth soon hopefully – its more than paid for its original cost of £18. I think it is important to think about the life of clothing items, even for something as frivolous as fancy dress, and if items can be reworn or resold then it makes them even more appealing.


Look for licensed
This may or may not be obvious - but costumes come in many forms, especially those based on movies, celebrities, pop culture and superheroes. So it is worth taking the time to track down what products are licensed or official as they are more likely to be accurate representations of the costume. Once you have an idea of brands and prices you can shop around.

Be prepared to adjust the fit
One of the biggest problems with bought costumes is the age old S, M or L problem. Bought costumes are made with an even more generic fit in mind than the high street so it is usually a good idea to try and set a little time aside for sewing in order to adjust the fit.

...and finally...

Accessorise!
Last but not least - once you have your costume it is important to add, make, paint, alter any components that are missing or aren’t quite right, for example, add gloves, sew on a trim, buy face paint, shoes, tights… the list is endless and it is these items that make the most difference to the overall effect of the costume. It is important not to overlook the details.

I hope that gives you some advice on where to start if you are ever pushed for time and need to buy a costume. I'll have a post on that leaving do next weekend hopefully, until then...


Tuesday, 7 February 2012

Hair and Beauty: Victory Rolls & A Cheats Guide To Curling Hair

Before I begin I’d like to say that this post is dedicated to Miss Doherty, my friend and hostess of The Vintage News, as without her advice, guidance and example I would not have learnt this skill.

This isn’t really a tutorial, but I received quite a few comments at the #ZOMGbloggersbash about my hair (a photo even ended up here) and since I was also planning something interesting for my trip to Blind Pig I thought I’d document the process.

Before I start here are a few things about me and my hair:
  • I have naturally wavy hair, not hugely so, but enough that it holds curls quite well (this is the only reason I don’t really need too much hairspray).
  • My hair was short for a long time after I had it cut for a speakeasy (yes I’m that committed) and now that its longer the layering can sometimes make it difficult to put rolls in, so I apologise if it’s not that neat.
  • Lastly I’m still learning… please be nice to me.

Curling
To start with I washed my hair yesterday morning, after letting it dry enough so that it wasn’t uncomfortable I rolled it into eight ‘victoryrolls’ one at the top of my head, two either side of my face, two behind them, two lower at the back and one at the very back.


I find these are a good placement so that the curls frame my face in the way that I like. But it’s taken a lot of attempts to find good spacing. Depending on how tight I want the curls I simply adjust the number of rolls. For tighter curls I aim for around ten rolls and for really lose ones around four to six will do. 


I then wore the rolls for the rest of the day with a ‘stylish’ head scarf and slept in them overnight. By then the hair is dry so its not uncomfortable. When I’m just simple curling my hair I would take them out the next morning ready for the day ahead, but for today I was planning on an evening out so I left them in under a different type of headscarf so I could take them out later.

Taking Them Out
To remove the rolls I take them out one at a time starting at the back, I brush the curl to smooth it, then separate into two or three sections and reshape the curl with my fingers to create a softer look.
Once all the curls are removed you could then spray with hairspray if you desire.

Taking out the curls...           and resetting them after brushing.     


Styling
At this point you can leave the curls to their own devices, add and alice band (my lazy staple) or something that I find looks great, re-make new rolls at the front of your hair line and leave the back down.


In this case however I was attending a Speakeasy so I wanted to opt for something a little bit more 1920s inspired. So I pinned the bottom of the curls underneath so that my hair would look shorter and a bit more flapper...


I hope that's given you some ideas, and maybe a bit of courage to have a go yourself!
(after all if I can do it anyone can...)


You may also like...

Related Posts Plugin for WordPress, Blogger...